Saturday, April 22, 2017

Burnished Velvet Thank You Cards


I think my favourite thing to do with my Silhouette Cameo is to make "die cuts" in cardstock and back them with tape, then burnish micro fine glitter into the tape. This fills the holes with glittery goodness that is soft as velvet and does not rub off.

This glitter technique is called Burnished Velvet and in real life these cards have a lot of wow factor. For the first one, the tulips, I backed the cardstock flower with white cardstock covered in double-sided tape and rubbed in iridescent glitter to create a glittery background. I wish this showed up better in the photo. (All photos expand if you click on them.)


Stamp: Stamp-it Australia

The tulip design was a cut file from the Silhouette store, as is the peony below. Here is what it looked like in the store:
Here is what I made with it:
Stamp: Waltzingmouse Stamps

I tried to do a little shading with a few pink shades of glitter. I need to practice that more. Basically I masked off sections of the flower (I used the Cameo to cut the mask from the tape liner) and sprinkled on the darkest hue in the centre, rubbed it in, then added the lighter sections. 


I used a milkshake straw cut on a diagonal as a scoop to pick up the glitter and place it (mostly) where I want it. The technique is magical because the glitter looks a bit dusty until you burnish it with your finger. Then it comes to life and really sparkles.


It is Administrative Professionals Day on Wednesday so these two cards are going to the people in my office who really deserve much appreciation for all they do for all of us!

You can see more Burnished Velvet cards by clicking on that label on the right hand side of this blog. You can find out how to do the technique here: Be Creative tutorials.

April Christmas Card


Sylvia Durocher's Christmas Card Challenge for April is a scalloped circle and the colour purple. I have this five year old pad of scrapbook paper called Nutcracker Sweet from Graphic 45 that features pinks and purples, so that guided me.


This card is a bit of a cheat for me. I always feel like I am cheating if I make a card with no rubber stamping involved. In this case I just layered various papers and die cut the scalloped circle. I sprayed the entire card front with a mist of Sparkle Sheer Shimmer Spritz, which you really cannot see in the photos. It lends a lovely shimmer to the entire card and makes it sing Christmas.
Still time to play in Sylvia's challenge for this month. I may try for another card in this theme that involves stamping. Stay tuned!

Saturday, April 1, 2017

March Christmas Card


Where did March go? Here it is April 1st and I am just getting to posting my card for last month for Sylvia's Christmas Card Challenge. In my defense, I actually did this card at the beginning of the month but I had moved my photo studio cube to clear space on my dressmaking table and have only now gotten it back in place.

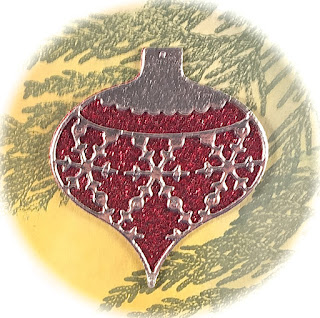
Sylvia's prompts for March were silver and ornament. I made three silver die cut ornaments for my card.
The background was created by sponging from my new Tim Holtz Distress Oxide ink pads. This was my first time using them and they are very soft and lovely. They blend easier than the regular Distress Inks. I like the contrast of the smooth chalk look and the silver foil on the die cuts.

The red ornament was made by laying the die cut on Sookwang Tape and sprinking with Glitter Ritz ultrafine glitter and burnishing in. The round ornament was placed over plain cardstock and I added colour with Copic markers. Here is a shot of the card on an angle so you can see the shine:

The sentiment is a Penny Black stamp from the Joy Filled clear stamp set. My local stamp store closed down this past week and this is one of the stamp sets I bought on discount. Very sad to see them close. I am sharing this over at Christmas Card Challenges as well. Thanks for visiting today.